Did you know a well-trimmed pottery piece can boost its value and look? Learning the basics of pottery trimming is key for any ceramic artist or hobbyist. It’s vital for beginners to grasp the techniques and steps for a top-notch finish.
In this detailed Pottery Trimming Guide, I’ll show you the key steps and techniques to enhance your ceramic work. Whether you want to better your skills or begin a new hobby, this guide has the ceramic trimming tips you need to start.
Key Takeaways
- Understand the importance of pottery trimming for ceramic artists
- Learn the essential steps for achieving a professional finish
- Discover tips and techniques for refining your ceramic creations
- Improve your skills with expert guidance
- Get started with the basics of pottery trimming
Understanding the Basics of Pottery Trimming
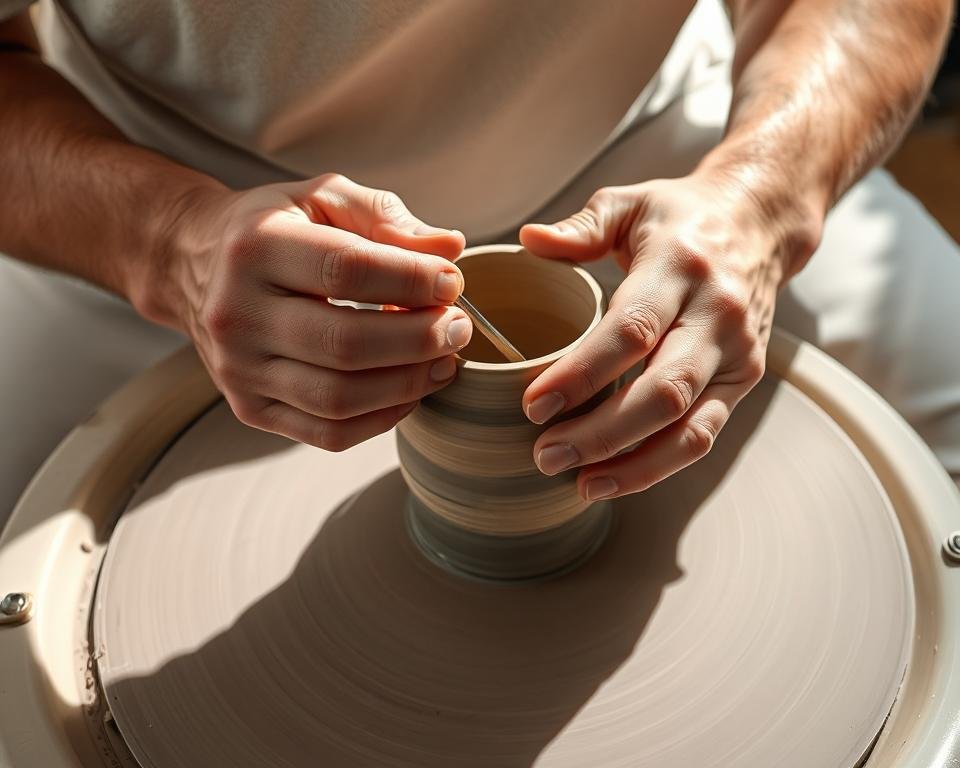
To make a ceramic piece look good and work well, you need to know how to trim pottery. Trimming is when you shape the foot and base of a piece after it’s been made on the wheel. It’s key for making the piece look nice and work right.
What is Pottery Trimming?
Trimming is about taking off extra clay from the foot and base of a piece. This makes the piece stable and balanced. It’s a careful job that needs patience and skill. A famous ceramic artist said, “Trimming is where the real craftsmanship starts. It needs a deep understanding of clay and the shape you’re making.”
“The trim is the final flourish that can make or break the overall impact of a piece.”
For a detailed guide on trimming a pot, check out Lakeside Pottery’s tutorial. It shows you how to trim pottery step by step.
Importance of Trimming
Trimming is important for a few reasons. First, it makes the base stable so the piece doesn’t warp or get out of shape when fired. Second, it makes the piece look better by giving it a clean, defined foot ring. Lastly, good trimming helps the piece look balanced and symmetrical.
| Benefits of Trimming | Description |
|---|---|
| Stability | Prevents warping during firing |
| Aesthetic Appeal | Creates a clean and defined foot ring |
| Balance and Symmetry | Enhances the overall form and visual balance |
Learning pottery trimming techniques can really improve your ceramic work. It doesn’t matter if you’re new or experienced. Knowing how to trim pottery well is a skill that can make your work better.
Essential Tools for Pottery Trimming
To get great results in pottery trimming, you need the right tools. Trimming pottery needs precision and the right tools to make top-quality pieces.
Trimming Tools Overview
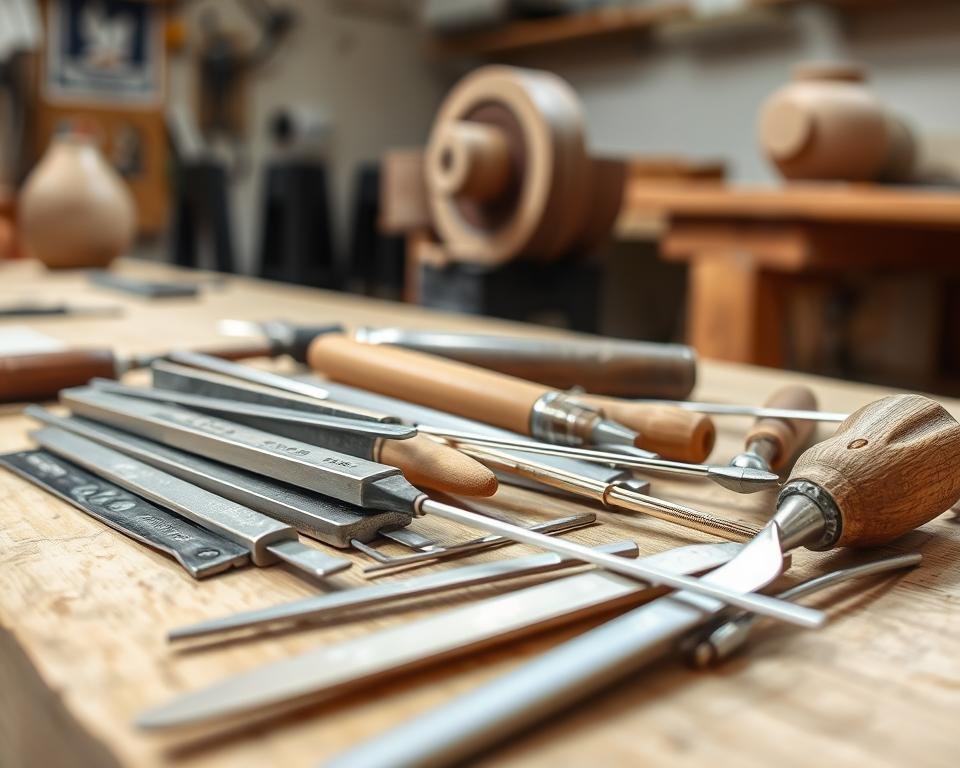
There are many tools for trimming pottery, each for different tasks. You’ll use loop tools for details and removing clay. Trimming chisels are good for removing more clay. And metal ribs help smooth out the surface.
Knowing what each tool does is key. Loop tools, for example, come in many shapes and sizes. They’re great for both small details and removing clay.
Choosing the Right Trimming Tool
Choosing the right tool depends on your project’s needs. Think about the clay type, the drying stage, and what you want to achieve. Beginners should start with a basic set and add more as they get better.
| Tool | Primary Use | Skill Level |
|---|---|---|
| Loop Tools | Detailing, Clay Removal | Beginner |
| Trimming Chisels | Substantial Clay Removal | Intermediate |
| Metal Ribs | Smoothing, Refining | Beginner |
Knowing about the tools and their uses can really boost your trimming skills. Try out different tools and methods to see what works best for you.
Preparing Your Pottery for Trimming
Getting your pottery ready for trimming is key. It makes the process smoother and leads to a better final product. Here, I’ll show you how to prepare your pottery for trimming.
Ideal Timing for Trimming
Timing is everything in trimming pottery. You should trim when the pottery is just right, not too wet or too dry. The best time is when it’s leather-hard, firm but soft to the touch.
To get to the leather-hard stage, control the drying area. Use plastic or a damp cloth to slow drying. Be patient, as rushing can cause uneven drying and damage.
Centering Your Work
Centering your pottery on the wheel is vital before trimming. It makes your piece symmetrical and balanced. Start by placing it on the wheel head and securing it with clay or a chuck.
Then, use the wheel to check if it’s centered. If not, gently adjust it with a loop tool or a rib. Once centered, you’re ready to start trimming.
Techniques for Effective Trimming
To improve your pottery, learning effective trimming techniques is key. Trimming greatly affects your piece’s look and function.
Basic Trimming Techniques
First, learn how to hold your trimming tool right and position your pottery. Proper technique is essential for smooth surfaces.
- Hold the trimming tool firmly but gently, allowing for precise control.
- Position your pottery at a comfortable height to avoid straining your back or arms.
- Begin with light, gentle cuts, gradually increasing pressure as needed.
Beginners should start with simple forms. This builds skills and confidence.
Advanced Trimming Skills
After mastering the basics, try advanced skills. These include detailed designs, refining the foot ring, and precise trimming.
| Technique | Description | Tips |
|---|---|---|
| Intricate Designs | Use fine trimming tools to create detailed patterns or designs on your pottery. | Practice on a spare piece before applying to your final work. |
| Refining the Foot Ring | Carefully trim the foot ring to create a smooth, even edge. | Use a metal rib to refine the edge for a professional finish. |
| Precision Trimming | Achieve precise control over your trimming tool to remove small amounts of clay accurately. | Work slowly and check your progress frequently. |
Mastering both basic and advanced techniques will greatly improve your pottery. It will make your craft even better.
Safety Tips for Pottery Trimming
Starting your pottery trimming journey means learning about safety first. Trimming pottery can be dangerous without the right gear and knowledge. It’s important to be safe to avoid injuries.
Protective Gear to Consider
Wearing the right gear is key to staying safe while trimming pottery. Here are some must-haves:
- Safety Glasses: Keep your eyes safe from flying clay and debris.
- Dust Mask: Avoid breathing in clay dust, which can harm your lungs.
- Apron or Smock: Keep your clothes clean and protect your skin from clay.
- Trimming Tool Handles: Make sure your tool handles are comfy and won’t slip.
Best Practices to Avoid Injury
Wearing the right gear is just the start. Here are some practices to stay safe:
| Best Practice | Description | Benefit |
|---|---|---|
| Keep Your Workspace Clean | Keep your area clean to avoid slipping on clay or water. | Less chance of accidents. |
| Use Proper Trimming Techniques | Learn and use the right trimming methods to avoid too much pressure. | Protects your hands and wrists. |
| Take Regular Breaks | Take breaks to rest your hands and stretch your body. | Less tired and less chance of injury. |
By following these safety tips and practices, you can enjoy a safe and creative pottery trimming experience.
Common Mistakes in Pottery Trimming
Pottery trimming is an art that needs precision and patience. Knowing common mistakes can help you get better. Even with good intentions, errors can happen. But knowing these mistakes can help you avoid them and get a professional finish.

Top Errors Beginners Make
Beginners often make mistakes like uneven trimming and using the wrong tools. They also forget to center their work on the pottery wheel. Uneven trimming can make a piece look off-center. Using the wrong tool can damage the clay or leave marks.
- Not using the correct trimming tool for the job.
- Trimming too much clay at once, leading to instability.
- Failing to maintain even pressure, resulting in uneven surfaces.
To avoid these mistakes, practice often and be patient. Learning about different trimming pottery tools and their uses can also help a lot.
How to Fix Trim Errors
If you spot errors during or after trimming, there are ways to fix them. For small unevenness, a fine-grit tool can smooth it out. For bigger issues, you might need to re-center and re-trim the piece.
To fix common trim errors, follow these steps:
- Assess the error to determine the best course of action.
- Use a fine-grit trimming tool to make adjustments.
- If necessary, re-center the piece on the wheel and re-trim.
By understanding common mistakes in pottery trimming and knowing how to fix them, you can improve your skills. Regular practice and a willingness to learn from mistakes are key to mastering pottery trimming.
How to Achieve Different Finishes
As you get better at pottery, you’ll want to try different finishes. The finish of your pottery can make it look better and more unique.
To get the finish you want, you need to know about pottery trimming techniques. There are many methods and tools to learn. With practice, you can make your pottery look smooth, sleek, textured, or detailed.
Creating Smooth Surfaces
Making surfaces smooth is key in pottery trimming. Use a sharp tool and work slowly to remove any flaws. A damp sponge or soft brush can also help smooth out the surface.
Here are some ceramic trimming tips for smooth surfaces:
- Use a gentle touch to avoid making new mistakes.
- Work in small areas to keep it even.
- Check your work often to catch errors early.
Textured Finishes for Character
Textured finishes can make your pottery unique. To get a textured look, try using tools like loop tools or household items like toothpicks.
Here are some ways to create textured finishes:
- Use a loop tool to make patterns or designs.
- Try using fabric or paper for different textures.
- Combine techniques for a layered, detailed look.
By trying out different pottery trimming techniques and tools, you can make your pottery look amazing.
Understanding Clay Types for Trimming
To trim pottery well, knowing about clay types is key. The clay you use affects your tools and techniques. It’s all about how the clay behaves.
Earthenware, stoneware, and porcelain are the main clays for pottery. Each clay has its own traits that can make trimming easier or harder. For example, earthenware is softer and more porous, making it easier to shape when wet.
Stoneware and porcelain, though, are stronger and denser. They need sharper tools and more careful techniques to work with.
Clay Composition Impact
The clay’s makeup changes its strength, durability, and how it works. Clays with more silica, like stoneware and porcelain, are tough but hard to trim. Knowing the clay composition helps pick the right tools and methods.
For porcelain, sharp tools are a must to avoid damage. Earthenware can be trimmed with duller tools, but sharp ones are better for a clean look.
Choosing the Right Clay
Picking the right clay is a big step in making pottery. Think about what your piece will be used for, its look, and your skill level. Beginners might find earthenware clay easier to work with.
Stoneware is great for bowls and plates because it’s durable and resists scratches. Porcelain is best for delicate, detailed pieces because of its strength and clear look.
Understanding clay types and picking the right one for your project leads to a successful trim and a beautiful piece.
Maintaining Your Trimming Tools
To keep your trimming tools in top shape, regular care is essential. Proper maintenance extends their life and keeps them working well.

Cleaning Your Tools Post-Use
Always clean your tools after each use. Clay residue can harden and be hard to remove if it dries. Use a soft brush or cloth to remove clay particles.
For tough residue, a gentle scrub with soap and water works well. But, avoid harsh chemicals or abrasive materials that can harm the tools.
It’s also important to dry your tools after cleaning. Moisture can cause rust or corrosion on metal parts. Use a dry cloth to wipe them down, focusing on crevices and moving parts.
Storing Tools for Longevity
Proper storage is key for your trimming tools. Keep them in a dry, organized area where they won’t get damaged or cause accidents. Think about using a dedicated toolbox or case with separate spots for each tool. This protects them and makes them easier to find.
For tools with moving parts, like wire cutters or loop tools, apply a bit of oil. This keeps the parts moving smoothly and prevents rust.
By following these easy maintenance tips, you can make your trimming tools last longer. Regular care is a small effort that greatly improves your pottery’s quality and your tools’ longevity.
Incorporating Trimming in Your Design
Trimming in pottery is more than just removing extra clay. It’s about making a work of art that looks good and works well. As you work on your pottery, you can make it more beautiful and useful.
Enhancing Aesthetics Through Trimming
Trimming lets you shape and detail your pottery, making it more attractive. By carefully removing extra clay, you highlight your work’s best features. Here are some ceramic trimming tips to make your pottery look better:
- Focus on the foot ring, as it greatly affects the look.
- Use trimming to add small details that give your piece character.
- Try different trimming methods to get unique textures and patterns.
Balancing Function and Form
A well-trimmed piece looks great and works well. It’s key to mix beauty with practicality in your pottery. For example, when making a bowl or vase, make sure trimming doesn’t hurt its use.
To get this balance, use these pottery trimming techniques:
- Make sure the walls are even to avoid breaking.
- Trim edges carefully to avoid sharp or rough spots.
- Use trimming to make a consistent and appealing shape.
By using these techniques, you can make pottery that’s both stunning and useful. It shows off your talent and skill.
Tips for Trimming Specific Forms
Learning to trim pottery means mastering different techniques for various forms. Whether you’re making a delicate vase, a sturdy bowl, or an elaborate sculpture, knowing each form’s unique challenges is key.
Trimming Bowls vs. Trimming Vases
Trimming bowls and vases needs different methods because of their shapes and uses. For bowls, focus on a stable base for even sitting. This means trimming the foot ring to the right thickness and centering it.
Vases, with their long, narrow necks, need a gentle touch. Balance is key, and I pay close attention to the body and neck transition for a smooth curve.
Special Considerations for Sculptures
Sculptures are a special case in trimming. They have complex shapes that need careful handling. When trimming a sculpture, think about its look and how trimming will affect it.
Also, remember the sculpture’s strength. Trimming can weaken it, so be careful. Only remove what’s needed to get the right shape.
For the best results, understand how to trim pottery well. Practice and patience are key to improving your work.
Resources and Further Learning
To master pottery trimming, keep learning and practicing. This guide has prepared you to explore more resources. These will help improve your skills.
Recommended Reading
Books like “The Potter’s Bible” by Robin Hopper are great for learning. They cover various techniques, including trimming. “The Ceramic Bible” by Louisa Taylor also offers valuable information on clay types and trimming.
Online Tutorials and Courses
Courses on Craftsy and Udemy can teach you pottery trimming. They include step-by-step guides and videos. You can also find tutorials on YouTube and pottery forums. Experienced potters share their techniques and best practices there.
